



































Creating a Redis Database
This page covers the configuration specific to Redis — its Database Mode and any engine-specific settings shown below. The rest of the creation flow — opening the wizard, namespace and name, version, machine profile, storage, and optional features — is the same for every engine and is documented in Common Steps.
Database Mode
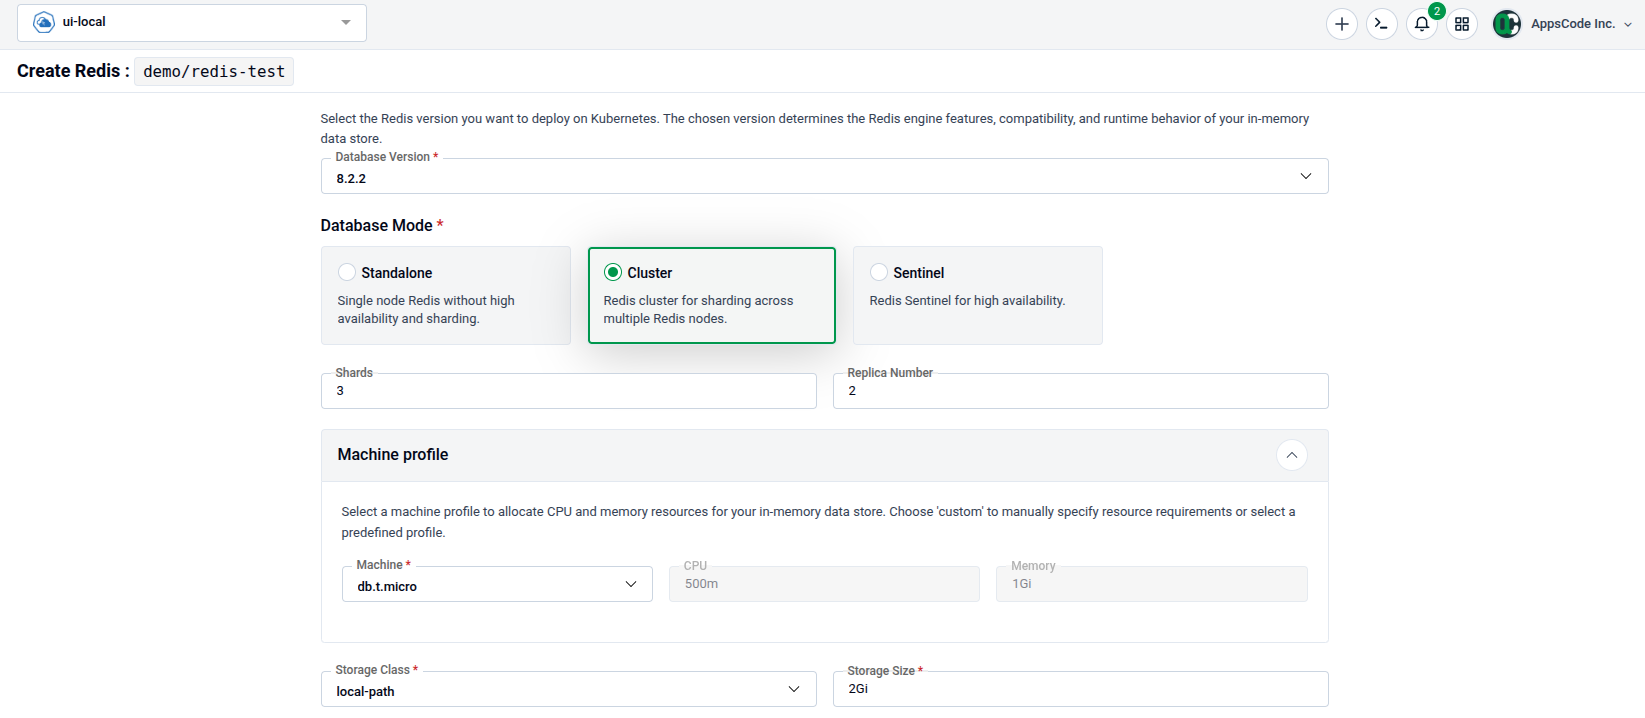
Select the topology under Database Mode. Three modes are available:
- Standalone — A single-node Redis instance. Best for development or low-traffic workloads.
- Cluster — A sharded Redis Cluster for horizontal scaling and high availability.
- Sentinel — A primary/replica setup monitored by Redis Sentinel for automatic failover.
| Mode | Key fields |
|---|---|
| Cluster | Master count and Replicas per master. |
| Sentinel | Number of Replicas and the referenced Sentinel instance. |
Announce Redis Endpoints (Cluster Mode Only)
Important — required if you plan to expose a Cluster-mode Redis externally. The default external endpoint (via Expose via Gateway, see Additional Options) is a single Kubernetes Service that load-balances across all pods in all shards. Redis Cluster clients don’t work well with that: a client’s request is only served correctly if the pod it happens to connect to owns the requested key’s slot — otherwise Redis replies with a redirect to the internal pod IP, which the external client cannot reach and the connection times out.
Toggling on Announce Redis Endpoints tells each Redis node to advertise its externally reachable address instead of its internal IP, so redirects point somewhere the client can actually connect to.
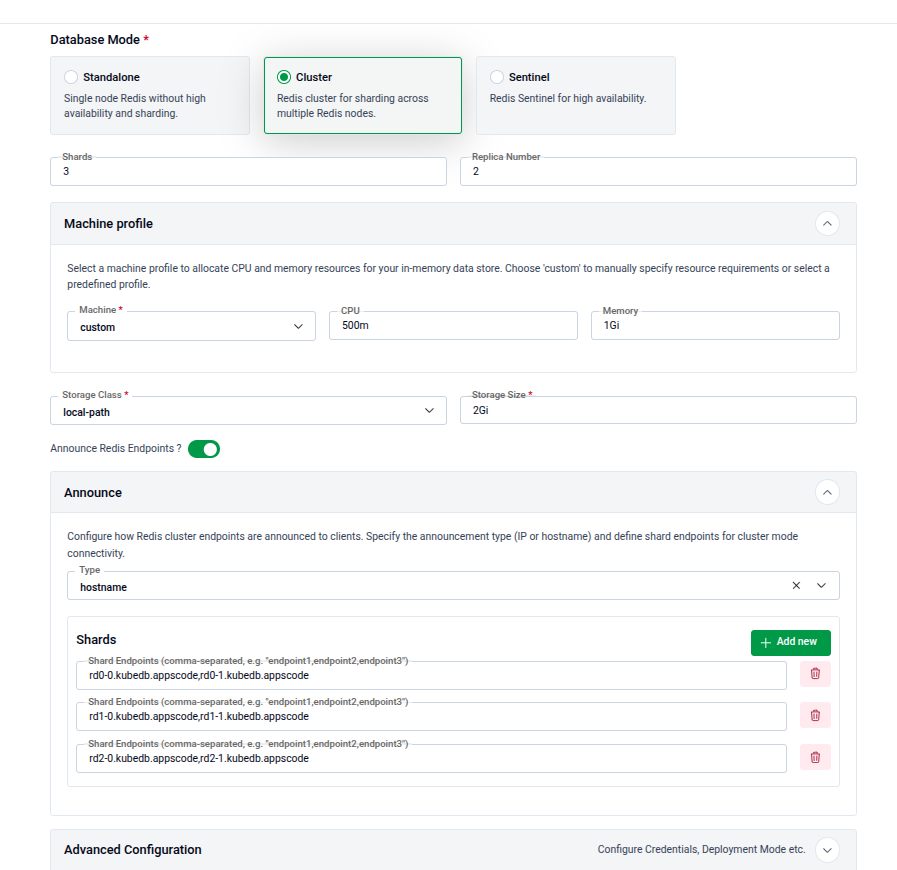
If Database Mode is Cluster, an Announce Redis Endpoints ? toggle appears below Storage Size. Turn it on to reveal the Announce panel:
| Field | Description |
|---|---|
| Type | How the endpoint is advertised to clients — hostname or ip. Ask your cluster administrator which one your externally reachable Redis endpoints use. |
| Shards | One row per shard, in the same order the shards are provisioned (shard 0, shard 1, …). Each row’s Shard Endpoints field takes a comma-separated list of the externally reachable endpoints for every node (master + replicas) in that shard. Use + Add new to add a row if you have more shards than rows shown. |
The number of shard rows must match the Shards count you set above, and each row must list one endpoint per node in that shard (master + replicas).
Whatever the Type (hostname or ip), the values you enter must ultimately resolve to the envoy service’s external IP. For hostname, point a DNS A or CNAME record at that IP; for ip, enter the envoy service’s IP directly. When exposure is enabled, envoy opens a set of ports on its external IP — one per Redis pod — and clients reach each pod through its assigned port.
Note: This only applies when you intend to connect to a Cluster-mode Redis from outside Kubernetes. If you only access it from within the cluster, or you’re using Standalone/Sentinel mode, leave this off.
For the underlying mechanism, see the Redis External Connections guide.
Create a Redis Database
- Open the wizard and select Redis — see Getting Started and Select a Database Type.
- Set the namespace and name.
- Pick the database version and the Database Mode described above, then set the machine profile and storage — see Configure the Database. For Cluster mode, configure Announce Redis Endpoints if you’ll expose it externally.
- Optionally configure Advanced Configuration (labels, deletion policy, credentials, point-in-time recovery) and Additional Options (monitoring, backup, TLS, gateway).
- Click Deploy.