





































Create a Client Organization
This guide walks through the Create Client Organization wizard. To open it, go to Site Administration → Client Organizations and start a new organization.
The wizard has four steps, shown on the right side of the form:
- User Information — organization and admin details.
- Select Cluster — hub and spoke cluster assignment.
- Gateway Configuration — how the organization exposes its workloads.
- Telemetry Configuration — review the monitoring setup and finish.
Step 1: User Information
Enter the organization details and choose its administrator.
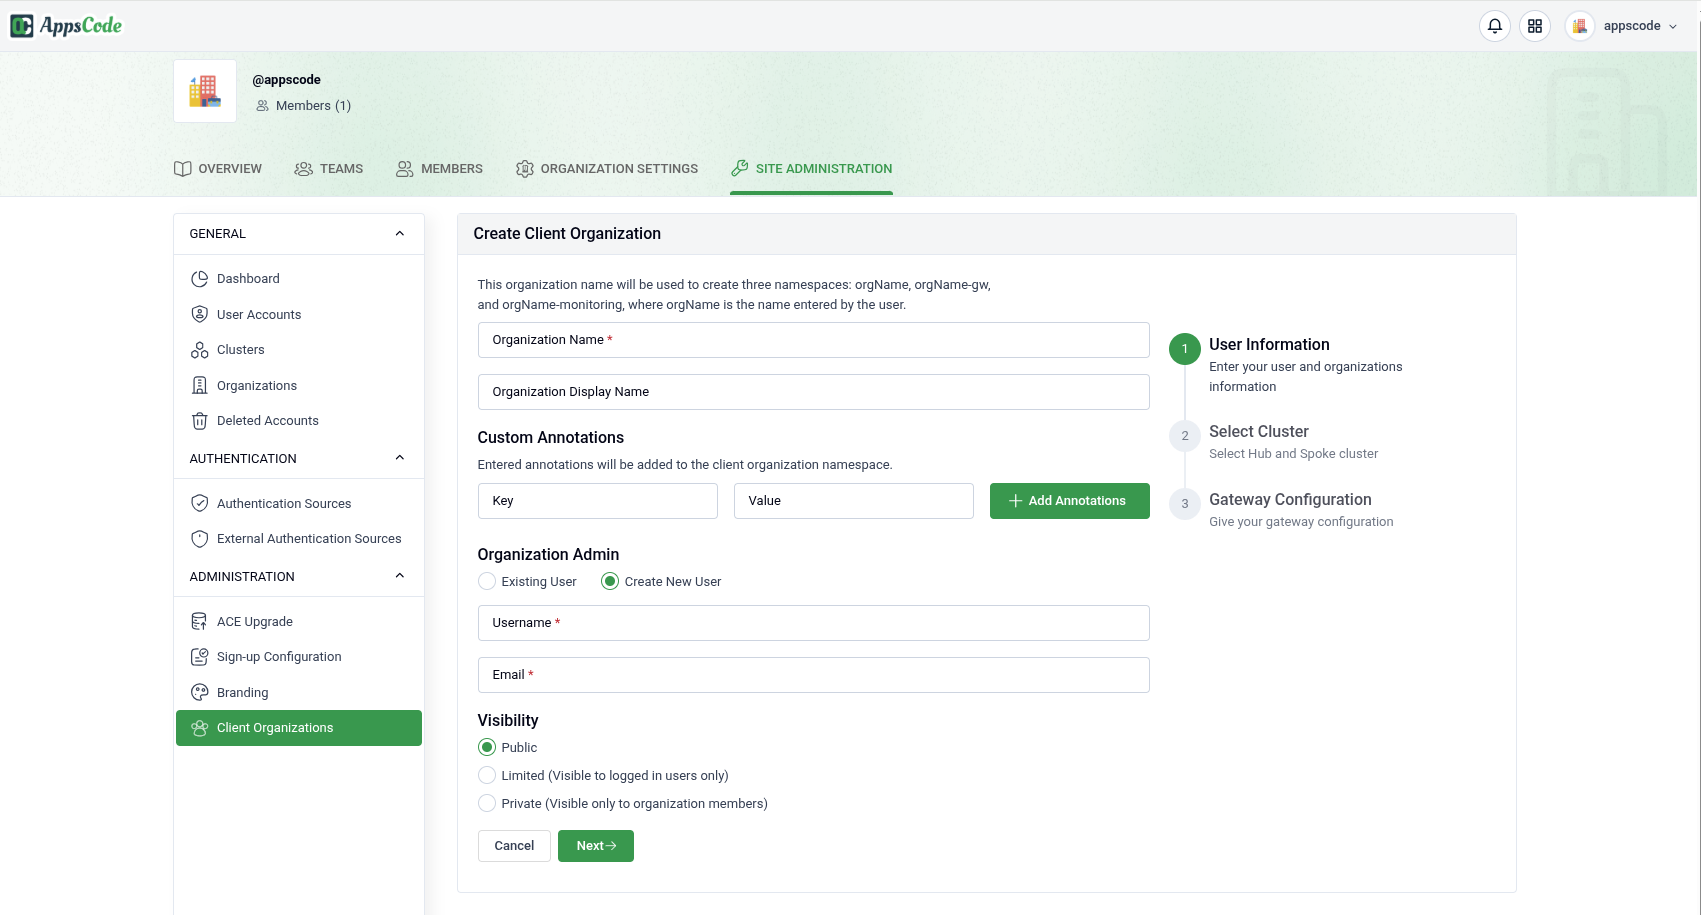
- Organization Name (required) — used to provision the three namespaces (
orgName,orgName-gw, andorgName-monitoring). - Organization Display Name — a friendly name shown in the UI.
- Custom Annotations — optional key/value pairs added to the client organization namespace. Click Add Annotations to add more.
- Organization Admin — choose Existing User to assign an existing account, or Create New User to provision a new admin by entering a Username and Email.
- Visibility — controls who can see the organization:
- Public — visible to everyone.
- Limited — visible to logged-in users only.
- Private — visible only to organization members.
Click Next to continue.
Step 2: Select Cluster
Assign the organization to a hub and spoke cluster, and optionally tune where its database workloads are scheduled.
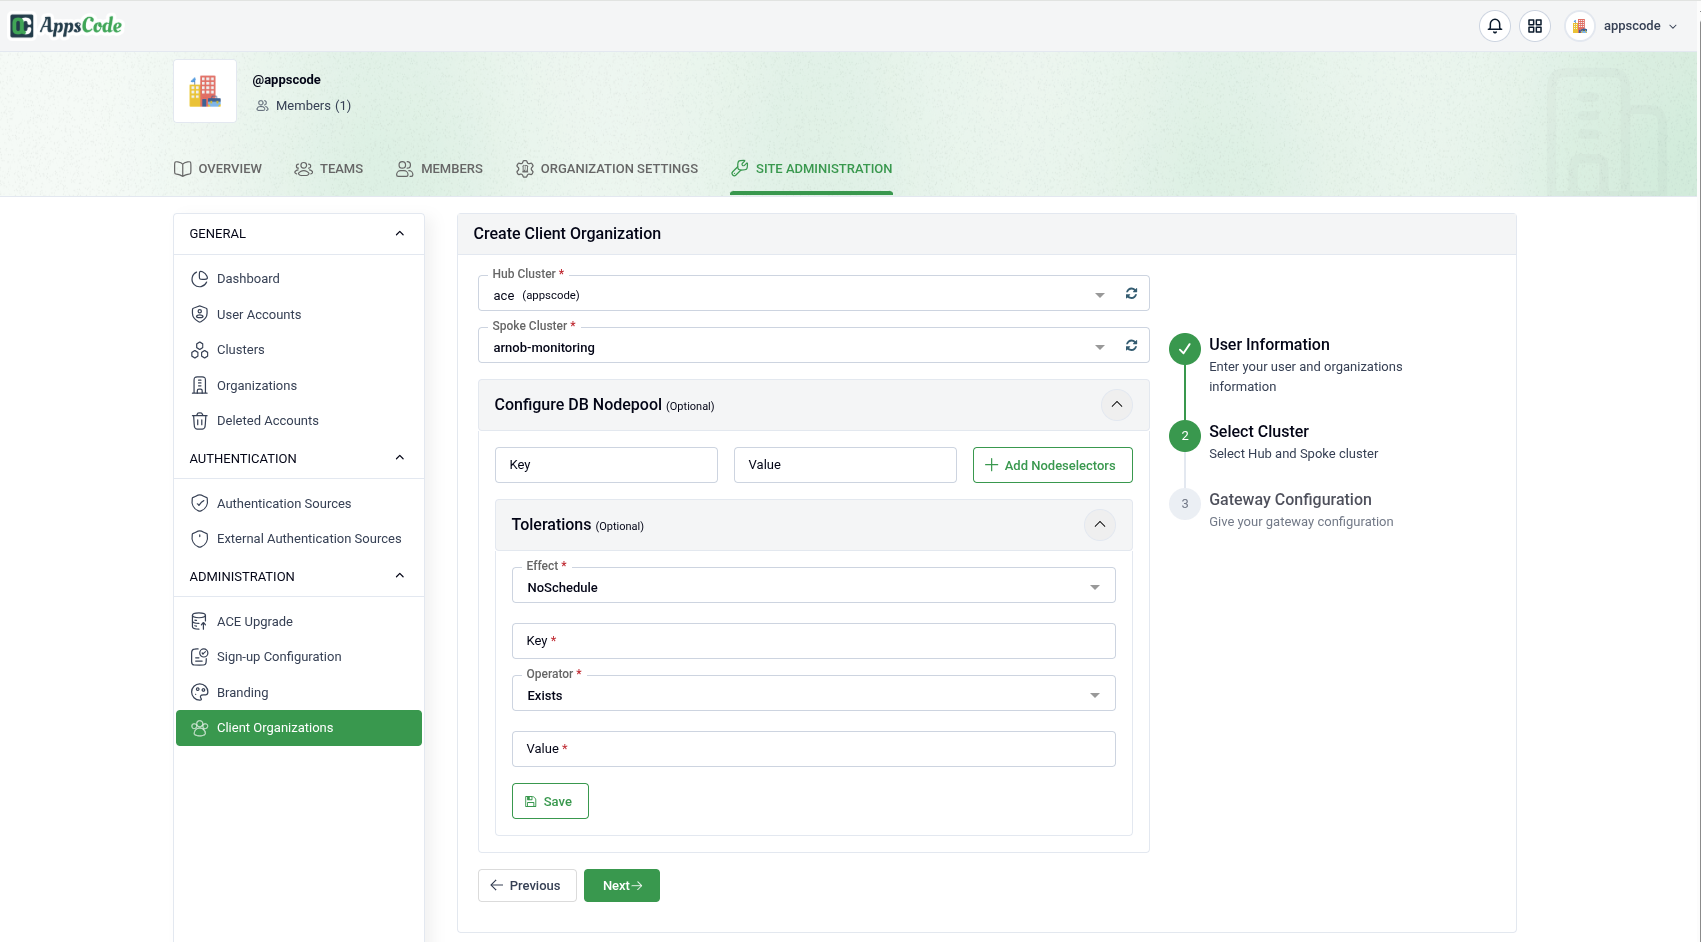
- Hub Cluster (required) — the management (hub) cluster for this organization.
- Spoke Cluster (required) — the spoke cluster where the organization’s databases run.
- Configure DB Nodepool (optional) — key/value labels used to target specific nodes for database workloads. Click Add Annotations to add more.
- Tolerations (optional) — add tolerations so workloads can be scheduled onto tainted nodes. Each toleration takes an Effect, Key, Operator (for example,
Exists), and Value.
Click Next to continue, or Previous to go back.
Step 3: Gateway Configuration
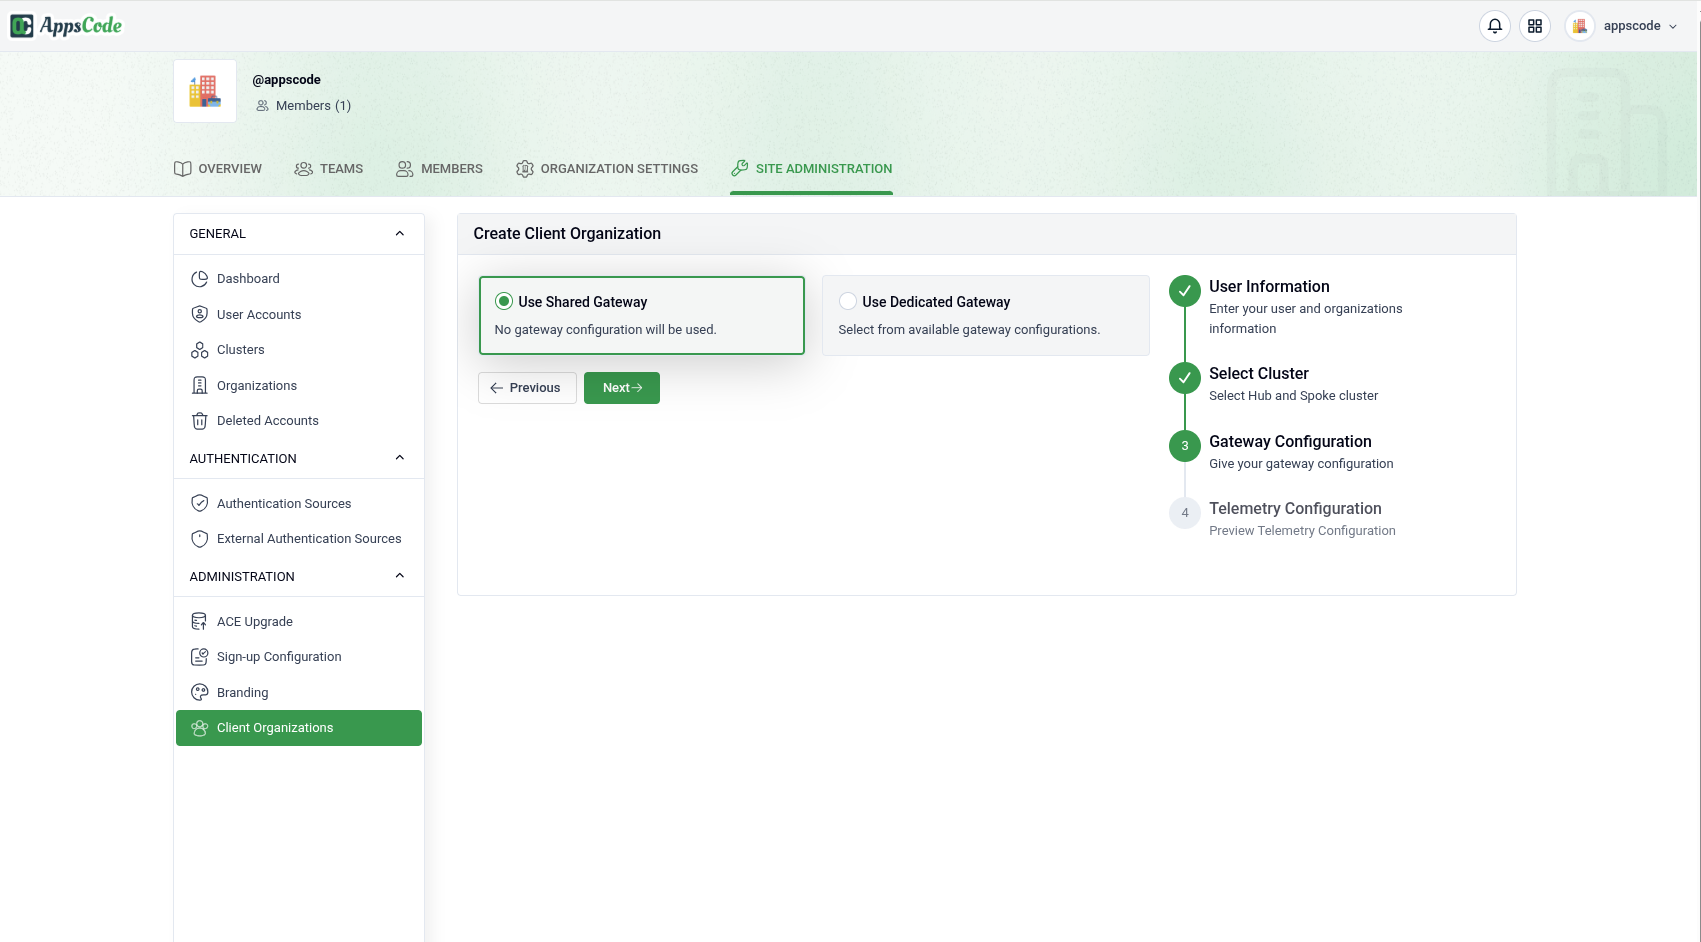
Choose how the organization exposes its workloads. There are two top-level options.
Use Shared Gateway
Select Use Shared Gateway to reuse the platform’s shared gateway. No additional gateway configuration is required.
Use Dedicated Gateway
Select Use Dedicated Gateway to give the organization its own gateway. Then pick a Dedicated Gateway Type.
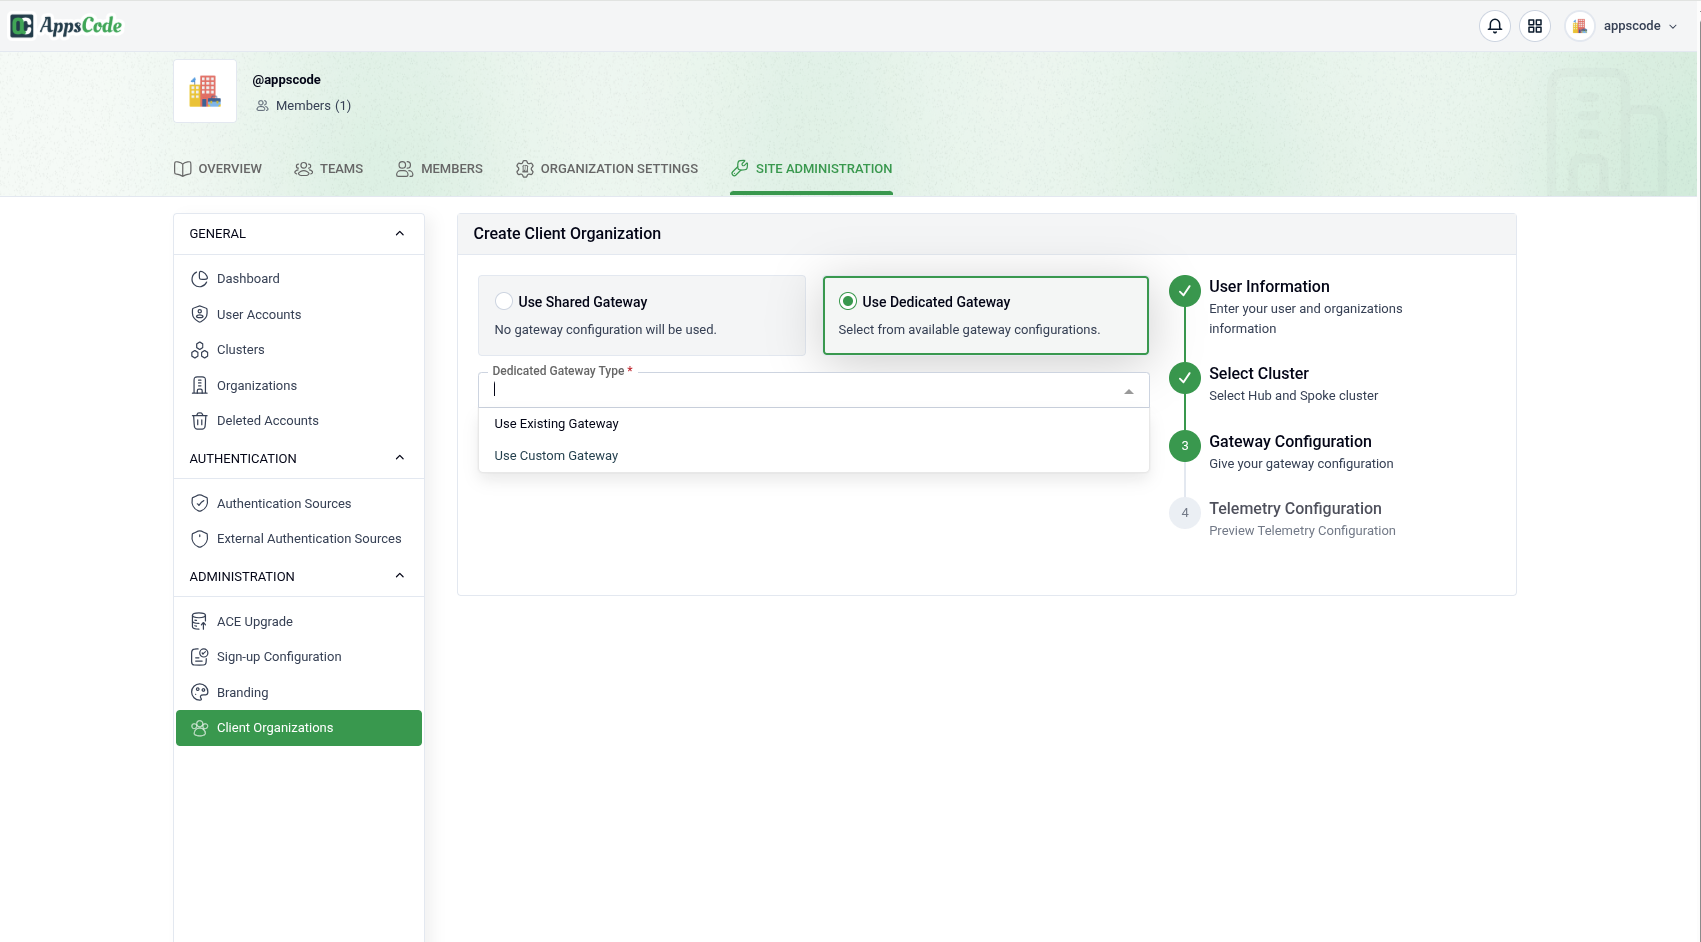
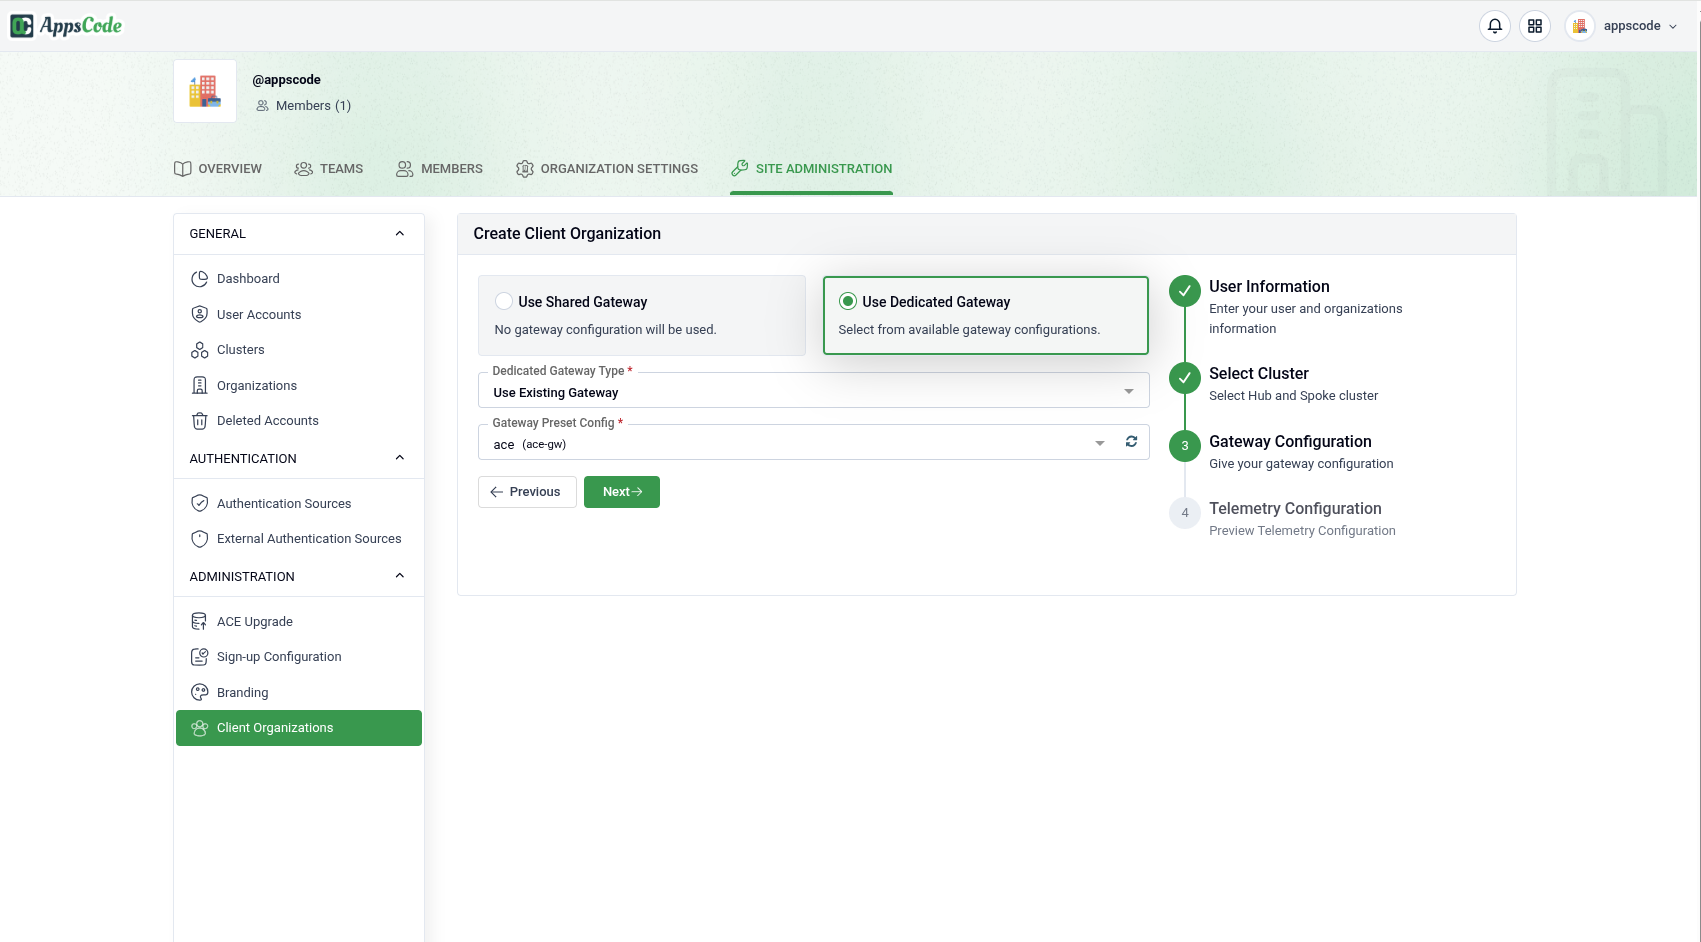
Use Existing Gateway
Choose Use Existing Gateway and select a Gateway Preset Config to reuse an already-defined gateway configuration.
Use Custom Gateway
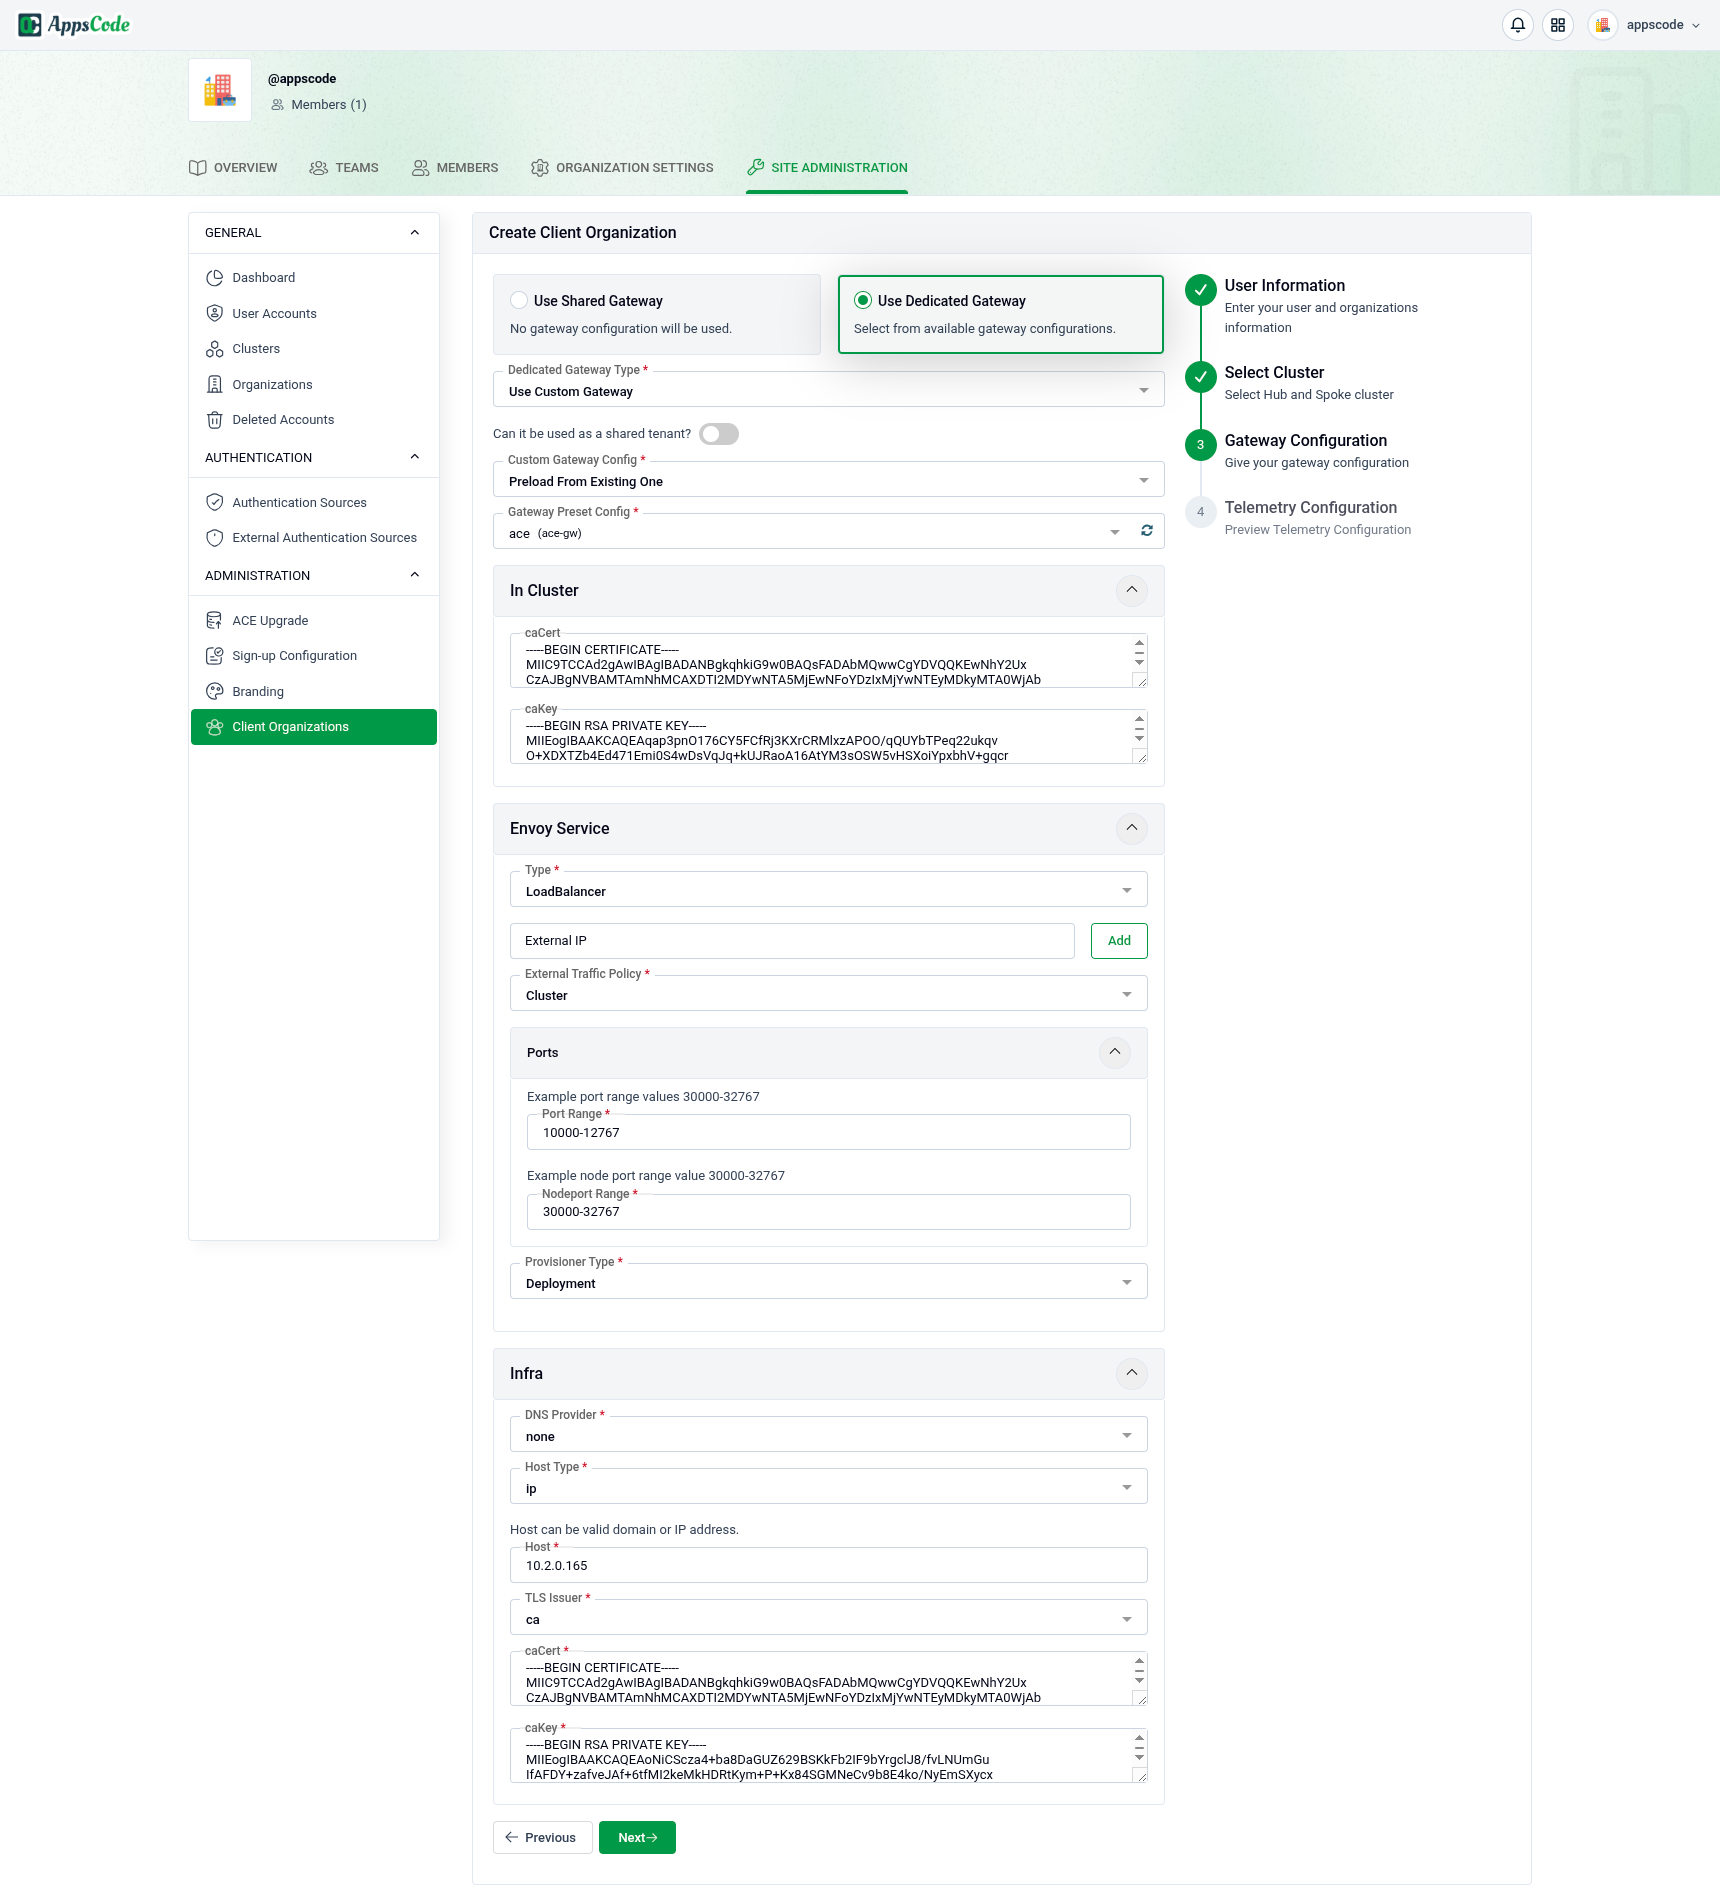
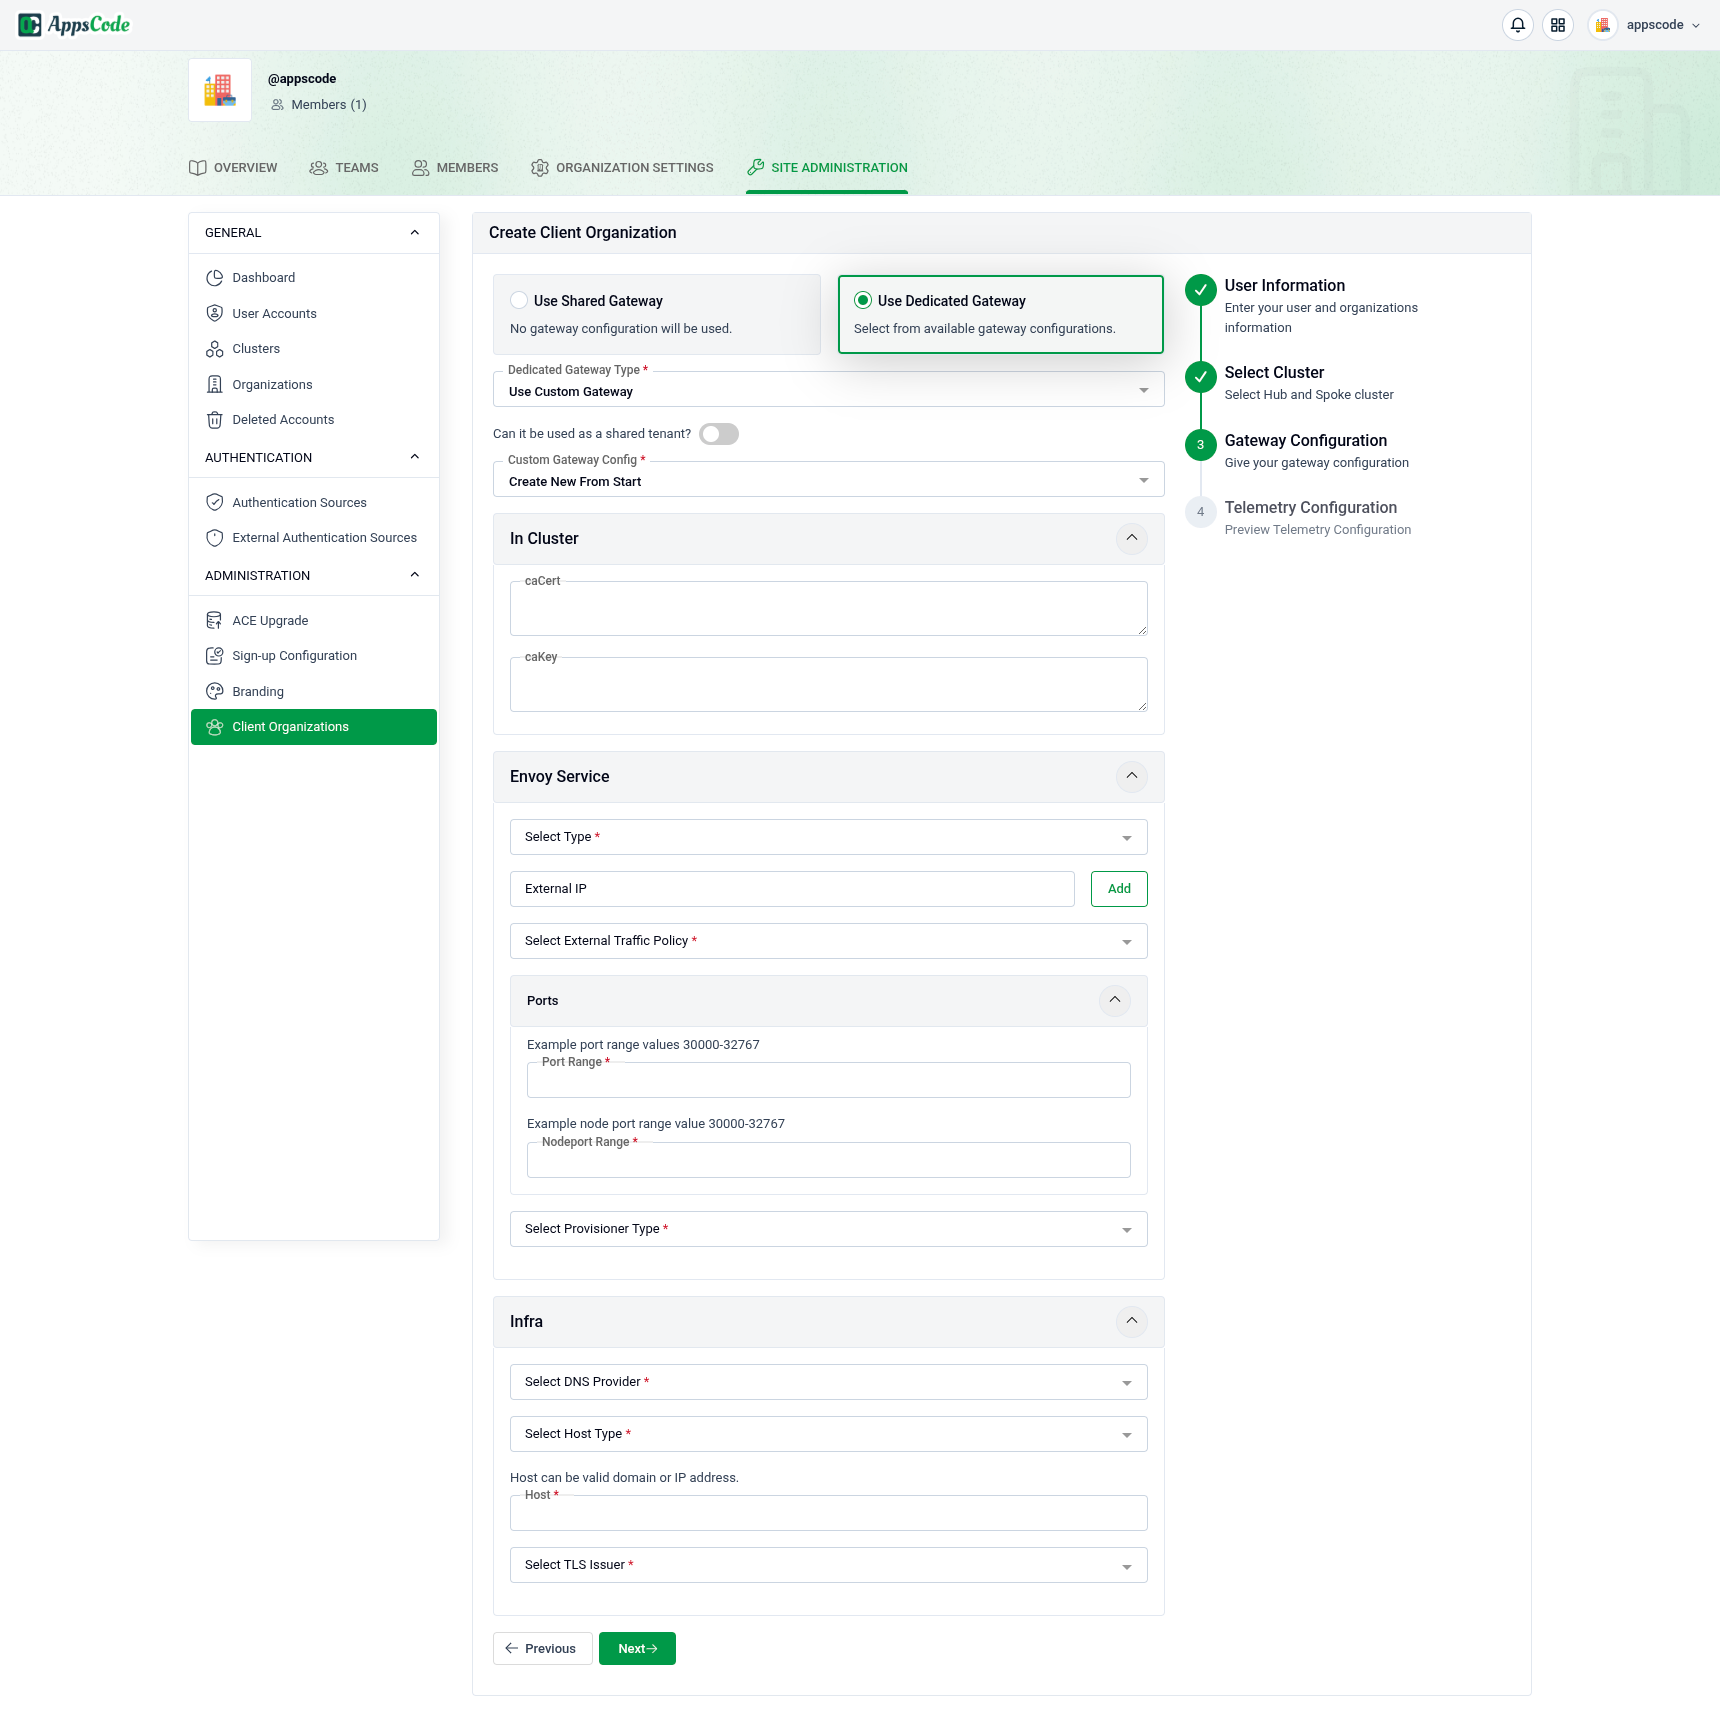
Choose Use Custom Gateway to define the gateway yourself. Use Can it be used as a shared Gateway? to pick a starting point.
Preload From Existing One — start from an existing Gateway Preset Config, then edit the pre-filled fields across the In Cluster (certificates and keys), Envoy Service (service type, external IP, traffic policy, ports, provisioner type), and Infra (DNS provider, host type, host/domain, TLS issuer) sections.
Create New From Start — build the gateway from scratch by filling in the same In Cluster, Envoy Service, and Infra sections with your own values.
Click Next to continue.
Step 4: Telemetry Configuration
In the final step, configure the telemetry settings that will be applied to the organization’s orgName-monitoring namespace, then finish to create the client organization.
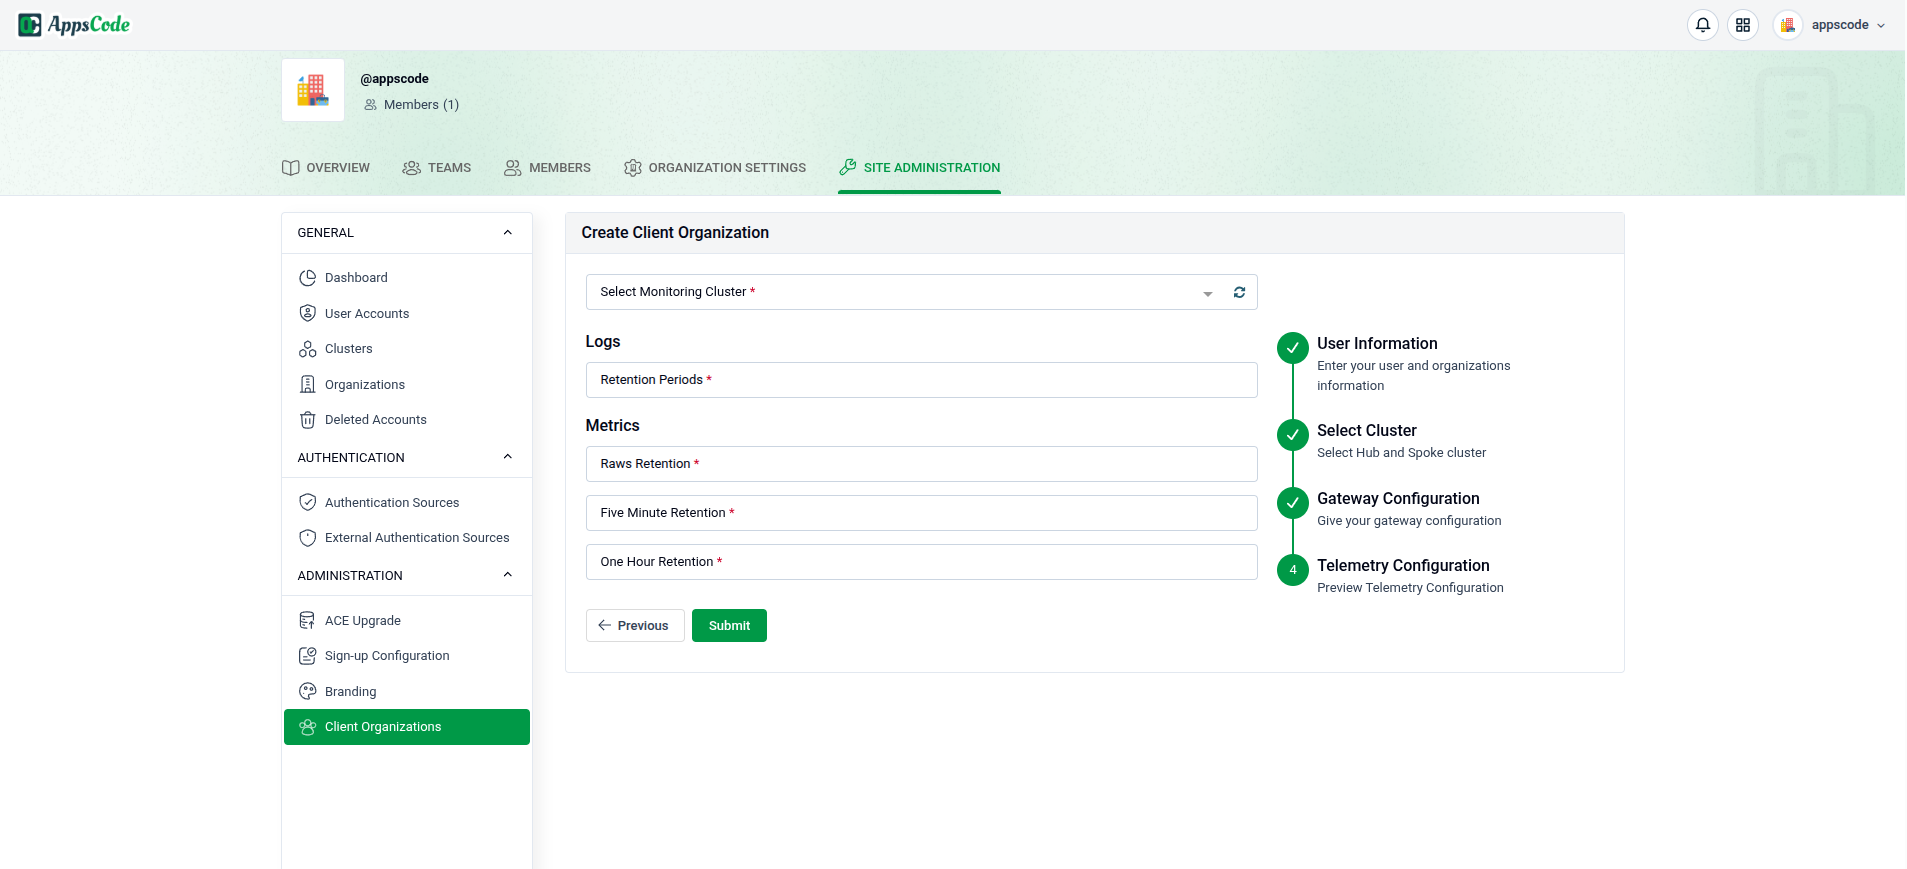
- Select Monitoring Cluster — the observability cluster that will store this organization’s telemetry. Its
tenant-operatorprovisions aTenanton the cluster’s TelemetryStack, isolating the organization’s data within the shared stack. See OpenTelemetry Monitoring for how the monitoring cluster is set up. - Logs — set the Retention Period for collected logs.
- Metrics — set the retention periods for collected metrics:
- Yearly Retention — how long aggregated yearly metrics are kept.
- Five Minute Retention — how long five-minute resolution metrics are kept.
- One Hour Retention — how long one-hour resolution metrics are kept.
Click Submit to create the client organization, or Previous to go back.
Once created, the organization appears in the Client Organizations list and its admin can sign in to begin using it.
Next steps
- Add a Cluster to an Existing Client Organization — assign additional clusters after the organization is created.